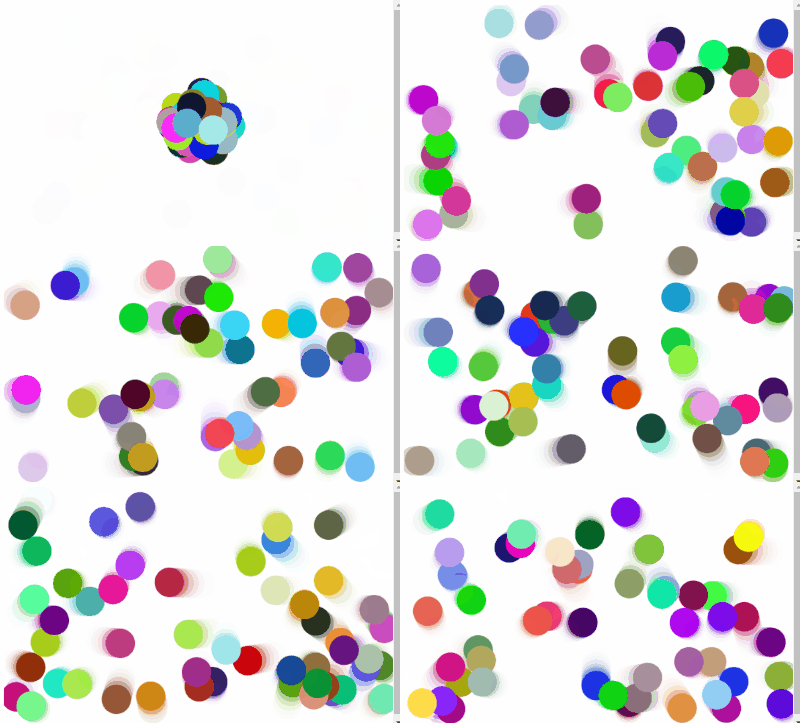
지난 글에서 여러 공들이 화면 안에서 튕기게 만들었는데, 이제 여기다가 중력을 가미해보자.


Javascript 캔버스에서 튕기는 공들 (w/o 중력)

이전 글에서는 공 하나가 화면 안에서 생각없이 튕기는 내용이었다. Javascript 캔버스에서 움직이는 공 그리기 유튜브에서 브라우저에서 각종 도형의 움직임을 Javascript로 구현하는 걸 보고 반해

mrkool.tistory.com

이 공들에 중력이 더해지면 아래와 같이 실제와 비슷한 운동을 보인다.

https://repl.it/join/vtffyilt-bryanko555 

대부분 동일하고, 프레임마다 다르게 그려주는 update()함수에 가속도 요소를 넣어준다. 


update(){ // 프레임마다 속성들을 변화시킴

  this.y += this.weight; // y방향 움직임을 무게로 가정해서 설정

  this.x += this.directionX;

  this.weight += 0.1; // 프레임마다 떨어질때의 가속도 증가

  this.directionX *= 0.997; // 가로방향 속도 감소. 가장 자연스러운 움직임을 보이는 수치로 찾은 값 

  if(this.y+this.size>canvas.height || this.y-this.size<0){ // 세로 방향 바운드 처리

    this.weight *= -0.8; // y 방향을 바꿔주면서 점차 바운스가 감소하게

  if(Math.abs(this.weight)<0.9){this.y = canvas.height-this.size; // 바운드가 어느 정도 이하가 되면 더 이상 바운드 안하게, 즉, 바닥에 붙게 한다.

  this.weight =1;} else { this.y -=1 ;} //

  };

  if(this.x>canvas.width-this.size || this.x-this.size < 0 ) { // 가로 방향 바운드 처리

    this.directionX *= -1; // x 방향 전환. 

  }

}


전체 코드 :


window.onload = function () {
 
  const canvas = document.getElementById('canvas');
  const ctx = canvas.getContext('2d');
  canvas.width = window.innerWidth-15;
  canvas.height = window.innerHeight-15;
 
  balls=[];
  ballNumber = 50;
 
  class Ball{
    constructor(x,y){ // ball의 기본 속성들을 정의 
      this.x = x;
      this.y = y;
      this.c = 'rgba('+Math.random()*255+','+Math.random()*255+','+Math.random()*255+')';
      this.size = Math.random()*10+5;
      this.angle = (Math.random()*360)*((Math.PI*2)/360);
      this.power = Math.random()*3+2;
      this.directionX = this.power * Math.cos(this.angle);
      this.weight = this.power * Math.sin(this.angle);
    }
    update(){ // 프레임마다 속성들을 변화시킴 
      this.y += this.weight; 
      this.x += this.directionX;
      this.weight += 0.1// 프레임마다 떨어질때의 가속도 증가
      this.directionX *= 0.997// 가로방향 속도 감소. 
      if(this.y+this.size>canvas.height || this.y-this.size<0){ // 세로 방향 바운드 처리
        this.weight *= -0.8// y 방향을 바꿔주면서 점차 바운스가 감소하게
        if(Math.abs(this.weight)<0.9){this.y = canvas.height-this.size; // 바운드가 어느 정도 이하가 되면 더 이상 바운드 안하게, 즉, 바닥에 붙게 한다.
        this.weight =1;} else { this.y -=1 ;} // 
        };
      if(this.x>canvas.width-this.size || this.x-this.size < 0 ) { // 가로 방향 바운드 처리 
        this.directionX *= -1// x 방향 전환.  
      } 
    }
    draw(){ // 넘어온 속성값대로 캔버스에 그림을 그려줌
       ctx.fillStyle= this.c;
       ctx.beginPath();
       ctx.arc(this.x, this.y, this.size, 0, Math.PI*2true);
       ctx.closePath();
       ctx.fill();
       ctx.strokeStyle = 'black';
       ctx.strokeWidth = 4;
       ctx.stroke();
    }
  }
 
  function init(){
      for(i=0;i<ballNumber;i++){
        balls[i] = new Ball(canvas.width*0.5, canvas.height*0.5)
      }
  }
 
  function animate(){ // 매 프레임마다 벌어지는 일들
    ctx.fillStyle='rgba(255,255,255,0.51)';
    ctx.fillRect(0,0,canvas.width,canvas.height);
    for(i=0;i<ballNumber;i++){
      balls[i].update();
      balls[i].draw();
    }
 
    window.addEventListener('resize',function(){ // 화면 크기가 변하면 캔버스 크기도 변경해줌
      canvas.width=window.innerWidth;
      canvas.height=window.innerHeight;
    })
    requestAnimationFrame(animate);
  }
 
  init();
  animate();
 
  }
cs

여기다가 좀 변화를 줘서, 공들을 360도 회전하면서 발사되게 해봤다.

https://repl.it/join/zxxofqqj-bryanko555

공이 한꺼번에 생성되는 것이 아니라, 하나씩 생성되서 발사되야 하기 때문에 setInterval로 시간 간격을 두면서 공을 생성해야 한다. requestAnimationFrame으로는 공들이 순식간에 생성되서 그냥 동시에 터지는 것처럼 보인다.

setInterval이 호출될 때마다 공을 한개씩 생성한다.그리고 생성된 공이 시계방향으로 돌아가면서 발사되야하기 때문에, 공(ball)의 속성에 각도(angle)를 추가했다.


class Ball{

  constructor(x,y,angle){ // ball의 기본 속성들을 정의

    :

}


function init(){

  if(num < ballNumber){ num++;} // 호출될 때마다 공을 1개씩 생성한다.

  balls[num] = new Ball(canvas.width*0.5, canvas.height*0.5, Math.PI*2/360 + i) // 각도를 순차적으로 증가시키면서 공을 생성한다.

}


setInterval(init,100);


오늘은 여기까지....


자바스크립트를 깨우치다:객체로 풀어보는 JavaScript의 원리

COUPANG

www.coupang.com

이 포스팅은 쿠팡 파트너스 활동의 일환으로, 이에 따른 일정액의 수수료를 제공받을 수 있습니다.

이전 글에서는 공 하나가 화면 안에서 생각없이 튕기는 내용이었다.


Javascript 캔버스에서 움직이는 공 그리기

유튜브에서 브라우저에서 각종 도형의 움직임을 Javascript로 구현하는 걸 보고 반해서 바로 공부를 시작. 이제서야 조금씩 머리속에서 그림이 그려져가고 있다. bouncing-ball-3.bryanko555.repl.co 이건 그

mrkool.tistory.com

이번에는 컴퓨터의 강점을 살려, 공의 갯수를 확 늘리게되면 이제 좀 볼만해진다.

이전에는 ball 클래스를 만들어놓고 공을 하나만 만들었었는데, 이번에는 초기화 함수, init()에서 공을 여러개 생성하고,

animate() 함수에서 그 공들을 매 순간 업데이트 할 때마다 계산해준다.


function init(){ // 공의 갯수만큼 공의 객체 생성

  for(i=0;i<ballNumber;i++){

    balls[i] = new Ball(canvas.width*0.5, canvas.height*0.5)

   }

}


function animate(){ // 매 프레임마다 벌어지는 일들

   ctx.fillStyle='rgba(255,255,255,0.8)'; // 전체 화면 지우기. 하얀색의 alpha값을 변경함에 따라 공의 잔상이 달라진다.

   ctx.fillRect(0,0,canvas.width,canvas.height);

   for(i=0;i<ballNumber;i++){

      balls[i].update();

      balls[i].draw();

    }

}


위 데모에서는 30개의 공을 그렸는데, requestAnimationFrame()이 1초에 60번 동작하고, 그 때마다 30개 공의 좌표를 이동시키고 그림을 그리고 벽에 닿았는지 판단해준다. 문돌이에게는 놀라운 일이다. ㅎ


다양성을 주기 위해서 각 공마다 랜덤 특성을 부여했다.

시작할때 공이 랜덤한 방향으로 날라가고,

    this.angle = (Math.random()*(Math.PI*2));

공의 색깔이 랜덤하게 생성되고, 

    this.c = 'rgba('+Math.random()*255+','+Math.random()*255+','+Math.random()*255+')';

공의 크기를 다르게 하고,

    this.size = 10+Math.random()*20;

공이 날라가는 속도를 다르게 했다. 


this.power = Math.random()*3+2;


아예 공의 수를 200개로...


이 공이 움직이는 것처럼 보이는 이유가, 매 프레임마다 캔버스 전체를 하얀색 상자를 그려서 덮어버리고 각 공들을 이동한 좌표로 그려주고, 다음 프레임에서 다시 다 지우고, 공들을 다시 그리고 ... 이렇게 반복함으로써 공들이 움직이는 것처럼 보이는 것인데...

캔버스를 덮을 하얀색의 투명도(alpha값)을 다르게 함에 따라서 공의 궤적을 다르게 볼 수 있다.

alpha =1 

alpha = 0.5

alpha = 0.1


전체 코드 :

window.onload = function () {
 
  const canvas = document.getElementById('canvas');
  const ctx = canvas.getContext('2d');
  canvas.width = window.innerWidth-15;
  canvas.height = window.innerHeight-15;
 
  balls=[];
  ballNumber = 20;
 
  class Ball{
    constructor(x,y){ // ball의 기본 속성들을 정의 
      this.x = x;
      this.y = y;
      this.c = 'rgba('+Math.random()*255+','+Math.random()*255+','+Math.random()*255+')'// 공의 색깔을 random으로 설정
      this.size = 10+Math.random()*20;
      this.angle = (Math.random()*(Math.PI*2));
      this.power = Math.random()*3+2;
      this.directionX = this.power * Math.cos(this.angle);
      this.directionY = this.power * Math.sin(this.angle);
    }
    update(){ // 프레임마다 속성들을 변화시킴 
      this.y += this.directionY; 
      this.x += this.directionX;
      if(this.y+this.size>canvas.height || this.y-this.size<0){ // 바운드 처리
        this.directionY *= -1;
        }
      if(this.x>canvas.width-this.size ) {
        this.x = canvas.width-this.size;
        this.directionX *= -1;
      } else if (this.x-this.size < 0){
        this.directionX *= -1;
      }
    }
    draw(){ // 넘어온 속성값대로 캔버스에 그림을 그려줌
       ctx.fillStyle= this.c;
       ctx.beginPath();
       ctx.arc(this.x, this.y, this.size, 0, Math.PI*2true);
       ctx.closePath();
       ctx.fill();
       ctx.lineWidth = 2;
       ctx.strokeStyle= 'black';
       ctx.stroke();
    }
  }
 
  function init(){ // 공의 갯수만큼 공의 객체 생성
      for(i=0;i<ballNumber;i++){
        balls[i] = new Ball(canvas.width*0.5, canvas.height*0.5)
      }
  }
 
  function animate(){ // 매 프레임마다 벌어지는 일들
    ctx.fillStyle='rgba(255,255,255,0.1)'// 전체 화면 지우기. 하얀색의 alpha값을 변경함에 따라 공의 잔상이 달라진다.
    ctx.fillRect(0,0,canvas.width,canvas.height);
    for(i=0;i<ballNumber;i++){
      balls[i].update();
      balls[i].draw();
    }
 
    window.addEventListener('resize',function(){ // 화면 크기가 변하면 캔버스 크기도 변경해줌
      canvas.width=window.innerWidth;
      canvas.height=window.innerHeight;
    })
    requestAnimationFrame(animate);
  }
 
  init();
  animate();
 
  }
cs

다음에는 중력까지 가미해보자.


자바스크립트를 깨우치다:객체로 풀어보는 JavaScript의 원리

COUPANG

www.coupang.com

이 포스팅은 쿠팡 파트너스 활동의 일환으로, 이에 따른 일정액의 수수료를 제공받을 수 있습니다.

유튜브에서 브라우저에서 각종 도형의 움직임을 Javascript로 구현하는 걸 보고 반해서 바로 공부를 시작.

이제서야 조금씩 머리속에서 그림이 그려져가고 있다. 


브라우저 안에서 계속 튕기는 공

bouncing-ball-3.bryanko555.repl.co


이건 그냥 단순하지만, 여기에다 배열과 반복이 더해지면 그럴듯한 그림이 그려진다. 

bouncing-ball-1.bryanko555.repl.co


오늘은 첫번재 기본적인 바운드 되는 내용부터 정리한다. 

html에 canvas를 설정하고, css에서 화면 가득 채우는 건 기본.

바로 Javascript로 넘어가자.

window.onload = function () { // 스크립트 로딩이 완료된 후부터 내용을 시작
 
  const canvas = document.getElementById('canvas');
  const ctx = canvas.getContext('2d');
  canvas.width = window.innerWidth;
  canvas.height = window.innerHeight;
  class Ball{
    constructor(x,y){ // ball의 기본 속성들을 정의
      this.x = x;
      this.y = y;
      this.c = 'rgba('+Math.random()*255+','+Math.random()*255+','+Math.random()*255+')'
// 시작할때 공의 색깔을 랜덤하게 설정. 이거 많이 사용하게 된다.
      this.size = 20// 공의 반지름
      this.angle = (Math.random()*(Math.PI*2)); // 공이 출발할 각도
      this.power = 5// 공의 세기
      this.directionX = this.power * Math.cos(this.angle); // 공이 좌우로 움직이는 값
      this.weight = this.power * Math.sin(this.angle); // 공이 상하로 움직이는 값
    }
    update(){ // 프레임마다 속성들을 변화시키는 함수
      this.y += this.weight; // y값을 계속 증가/감소 시킨다
      this.x += this.directionX; // x값을 계속 증가/감소 시킨다.
 
     
      if(this.y+this.size>canvas.height || this.y-this.size<0){ // 상하 바운드 처리
        this.weight *= -1// 상하에 닿으면 방향을 전환
      }
      if(this.x>canvas.width-this.size || this.x-this.size < 0) { // 좌우 바운드 처리
        this.directionX *= -1// 좌우에 닿으면 방향을 전환
      }
    }
    draw(){ // 넘어온 속성값대로 캔버스에 원을 그려주는 함수
       ctx.fillStyle= this.c;
       ctx.beginPath();
       ctx.arc(this.x, this.y, this.size, 0, Math.PI*2true);
       ctx.closePath();
       ctx.fill();
    }
  }
 
  init = () => { // 그려질 공의 개체를 설정하는 함수
      ball1 = new Ball(canvas.width*0.5, canvas.height*0.5)
  }
  function animate(){ // 매 프레임마다 그림을 새로 그려주는 함수
    ctx.fillStyle='rgba(255,255,255,0.5)'; // 매 프레임마다 캔버스를 통째로 칠하는 색깔. 맨 마지막의 alpha값에 따라 공의 잔상이 남는 정도가 달라진다.
    ctx.fillRect(0,0,canvas.width,canvas.height); // 캔버스 전체를 색칠해서 내용을 지워준다
    ball1.update(); // ball1의 좌표 등을 업데이트 한다
    ball1.draw(); // 업데이트된 내용으로 ball을 새로 그린다.
    window.addEventListener('resize',function(){ // 화면 크기가 변하면 캔버스 크기도 변경해줌
      canvas.width=window.innerWidth;
      canvas.height=window.innerHeight;
    })
    requestAnimationFrame(animate);
  }
  init(); // 공의 초기 좌표를 설정하고,
  animate(); // 프레임마다 공을 그려준다.
 
  }
cs

구조를 간단히 말하자면, 

  ] 그려질 ball의 기본 속성을 정하는 부분 : Ball.constructor(x,y)

  ] ball이 움직일 때마다 x,y 값을 변경해주고, 테두리에 부딪치면 -1을 곱해서 반대로 움직이게 하는 부분 : Ball.update()

  ] 생성된 ball들을 canvas에 그려주는 부분 : Ball.draw()

  ] 위의 함수들을 약 1초에 60번씩 호출해서 반복시키는 부분 : animate()


위의 것이 기본적인 구조이고, 저 구조 안에서 공의 개수를 늘리고, 중력값을 주고, 색깔을 변하는 등의 변화를 주면 점점 그럴듯한 그림으로 변해간다. 

앞으로 계속 변형을 늘려가보자.


자바스크립트를 깨우치다:객체로 풀어보는 JavaScript의 원리

COUPANG

www.coupang.com


이 다음에는 공을 여러개로 늘려서 움직여보자.


Javascript 캔버스에서 튕기는 공들 (w/o 중력)

이전 글에서는 공 하나가 화면 안에서 생각없이 튕기는 내용이었다. Javascript 캔버스에서 움직이는 공 그리기 유튜브에서 브라우저에서 각종 도형의 움직임을 Javascript로 구현하는 걸 보고 반해

mrkool.tistory.com

이 포스팅은 쿠팡 파트너스 활동의 일환으로, 이에 따른 일정액의 수수료를 제공받을 수 있습니다.

+ Recent posts